 So, a little background information....when we bought this house we bought the home and all the furniture which has been quite a blessing. The previous owners had a different style taste than us, but we could see the great structure of the home just hiding under a gigantic mass of electric metallic wild and funky wall paper!
I can't tell you how many months of work, blood sweat and tears have gone into removing that wall paper! Just ask Kenny, he's my workhorse! *winks* I don't know what I'd do without him! (probably still be living in that wild wallpaper world)
Anyway, here is the progression of our guest bathroom renovation!
Before, this is how it looked on the day of purchase....
 (Navy blue and chrome-y silver wall paper, yellow-ish green tile, bathtub only and a lacy fabric drapery over the tub.)
Our first few steps of the remodel process involved taking down the drapery, removing ALL the wall paper and the old light fixture. My Dad helped a ton and removed the upper tile surrounding the bathtub and replaced the old sheet rock with concrete backer board. He also re-plumbed the bathtub faucets so that we could have a working shower and bathtub.
 (sorry, this isn't a very good picture, but it's the shower surround with the new backer board) *winks*
Next we removed the old toilet and Kenny put in some hard time jack hammering and chipping up all the old ceramic tile on the floor.
 He really worked hard on this, using that jackhammer that is so heavy I could only use it for about 67 seconds *laughs*
The next step was to patch some holes in the sheet rock. This is where I get to show off my little tiny bit of expertise. They had the toilet paper holder all the way across the room on the opposite wall. You couldn't even reach it from the toilet, so we easily decided that had to change. Once it was removed there was just a crazy hole in the wall. So, I patched it and filled the joints and now you can't even tell it was there! (can you tell I'm feeling a little proud?)
 After patching and sanding and smoothing several times we textured the walls and painted the bathroom a beautiful shade of blue.
Next step was installing our tile! Wow! Being novice tile layers we were feeling a little intimidated, but we forged ahead, read some books, watched some videos, measured twice (65 times) cut once and got started!
We decided to purchase a nice tile saw. It cost about $200, but turned out to be well worth it! If we had rented a tile saw it would have been $60 a day plus the purchase of a blade and we would have felt rushed and might have made some hasty cuts.
.JPG) Kenny ran that saw like a pro from day one! I was so proud of him! He never broke a single tile or made one single wrong cut! Wow!!
Kenny ran that saw like a pro from day one! I was so proud of him! He never broke a single tile or made one single wrong cut! Wow!!So, I measured, he cut and we got the first day's tiling underway! WHAT an ADVENTURE! *laughs* You have to mix that thin set just right, and put it on the wall just the right thickness, check to make sure you're getting full coverage on the back of the tile and get each tile lined up and spaced correctly! Whoa! Well, here's our progress for day one *smiles*
 One video we watched taught us a neat trick for making sure your tile is level. We measured and used a level and screwed a 1"x 2" into the back wall and applied our tiles resting on the board. See it there *grins* This way you are assured that all the tile is level! Wow!
Days two and three and four and five and six were spent doing much the same thing, me measuring, Kenny cutting tile and us applying it to the walls together until about midnight! Whew! We were getting pretty tired of tile by day six...
 after the upper tiles were dry we could remove the 1"x2" and the lower tiles are taped to the ones above to hold them in place (still level, cool!)
 We kept on working and eventually got the walls all done! We were so excited once those first two floor tiles were in place, "the end is near"!
 We kept working on the floor making sure these tiles were level to walk on and finally got it all finished!
Doesn't it look lovely with all that glamorous blue tape *laughs*
I have to admit, the only tile we ever broke was my fault. It was one of the last l-o-n-g evenings of tiling and I was using a rubber mallet to hammer the tile down level with the others. And, out of sheer frustration, I smashed it right in half! (Come on Karen, settle down!)
Our next step was grouting. We mixed it up just right and Kenny did all the hard work getting it worked into those little grooves.
The following evening Dad helped us install an exhaust fan and Kenny got the toilet all installed.

It isn't completely finished....we still plan to re-do the woodwork, install a granite vanity top, add a mirror over the vanity and some baseboard molding....but it's coming along pretty well! *smiles* Thanks for sharing in the adventure!


 This
This  I don't know where it came from!? I love the fact that I didn't plant it or urge it to grow and it came up from underneath and between crabgrass and weeds. A precious perfect purple petunia!
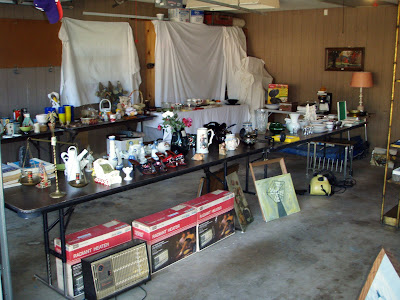
 That is a bigger chore than it sounds like. We had a lot of large furniture pieces, but we also had a TON (I'm talking a million billion) of small things to price....that is where the work comes in. Cleaning them off, making them shiny, deciding on a price, sorting them out on tables, all that work!
 But, we are so thankful, it turned out to be a GREAT sale and we made a lot of money which will come in so handy with our remodeling projects.
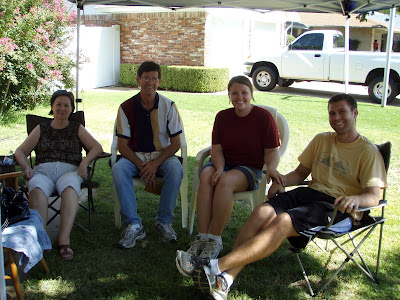
 We had the garage sale on Thursday, Friday and Saturday and were up and moving by about 4:30 in the morning every day getting things set up and ready for business. Dad and Mom came over and met us by about 5:00am and Dad brought two huge canopies to block the sun (and a crazy rain downpour on Thursday *laughs*) and we all got to workout our leg and back muscles to the extreme carrying out recliner chairs, a couch, beds and dressers, whew!
 I don't know what we would have done without Mom and Dad to help hold down the fort. And Kenny was such a trooper! I took off for work by nine everyday except Saturday, but he had to stay and haggle with the buyers *grins* I'm so thankful for this sweet man!
 Here are some of our lovely blue dishes...
 and Hummel figurines...
 Honestly, we were just thankful to get some of this stuff cleared out of our house! And we owe a big Thank You from the bottom of our hearts to Mom and Dad for being our sale buddies for the week! We love you!!
.jpg) He was born at 8:24am weighing 8 lbs exactly and 21 inches long. Just a perfect bundle of joy!
He was born at 8:24am weighing 8 lbs exactly and 21 inches long. Just a perfect bundle of joy! Do you know what else? This was completely natural too....that means NO epidural! Wow! Isn't she amazing!? I am so very proud of her and couldn't be more excited to be an Aunt again! *smiles*
 Welcome to the world sweet Griffin! We love you!


.jpg)